 condoo.Vibe
Cloudinary
Connect Cloudinary to upload, store, transform, and deliver images and other media inside the applications you build with condoo.Vibe.
Cloudinary lets applications you build with condoo.Vibe upload, store, manage, and deliver media such as images.
You can use Cloudinary for:
- Profile photos
- Product images
- Property galleries
- Portfolio images
- Blog images
- User-generated media
- Listing photos
- Thumbnails
- Image galleries
- Other media-driven experiences
Once Cloudinary is connected, describe what users should upload and how that media should be used inside your application.
Connect Cloudinary. Describe the media experience. condoo.Vibe builds the upload workflow.
Why Use Cloudinary?
Imagine you're building a real estate platform.
Each property might have:
- Property Name
- Price
- Location
- Description
- Bedrooms
- Bathrooms
- Images
Information such as the property name, price, and location belongs naturally in your application's database.
The actual image files are different.
A common architecture looks like:
PROPERTY
   ↓
Neon Postgres
Property information
   ↓
Cloudinary
Property images
Your application connects the two.
Database vs Media Storage
This distinction is important.
Suppose a customer uploads a profile photo.
Cloudinary can store and deliver the image.
Your database can store the information your application needs to associate that image with the customer.
Conceptually:
User uploads image
       ↓
Cloudinary
       ↓
Media reference
       ↓
Neon Postgres
       ↓
User Profile
       ↓
Image displayed
The user simply sees their profile picture.
The application handles the systems behind it.
Before You Start
You'll need a Cloudinary account and the credentials required by condoo.Vibe's Cloudinary connector.
Your Cloudinary account provides the configuration required for applications to communicate with the service.
Connect Cloudinary to condoo.Vibe
Open your condoo.Vibe project and navigate to Connectors.
Find Cloudinary and select it.
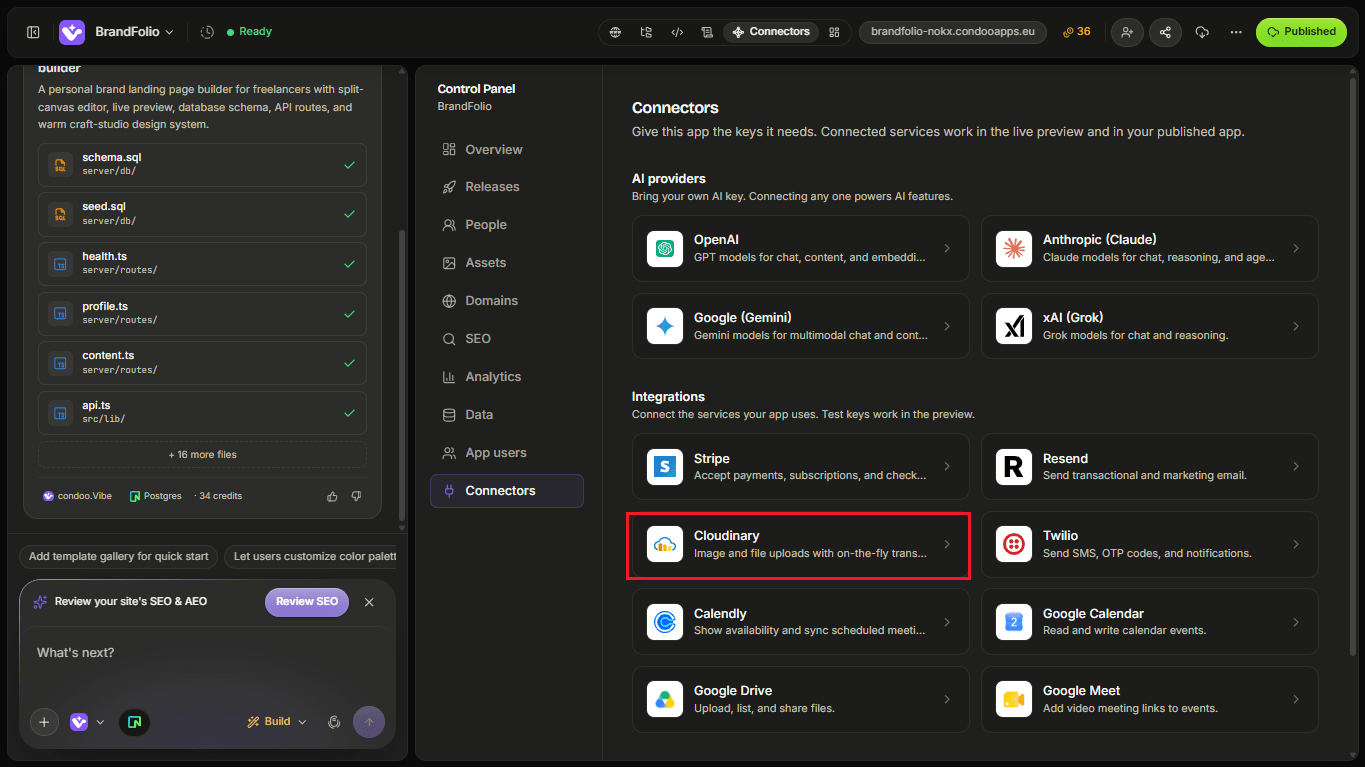
Follow the connection flow and provide the Cloudinary information requested by condoo.Vibe.
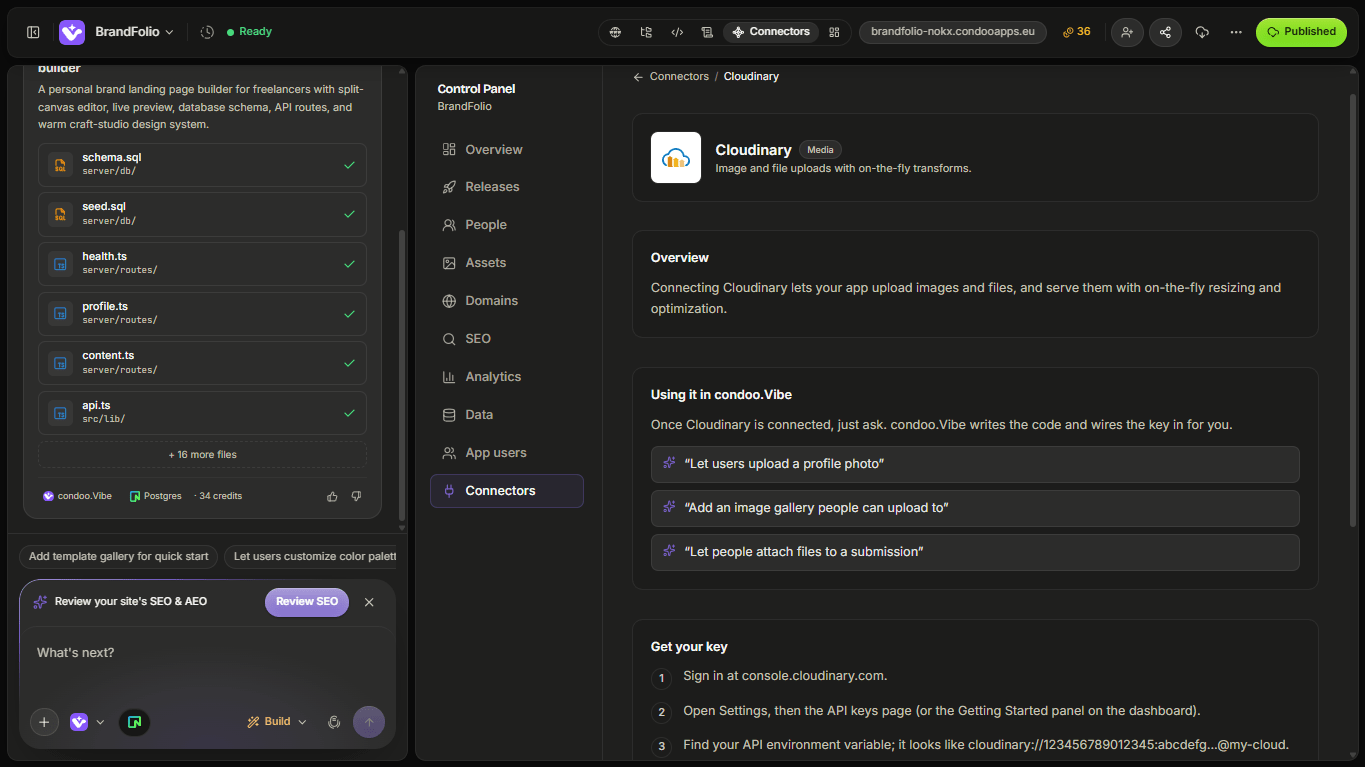
Once connected, you can ask condoo.Vibe to build media functionality into your application.
Build Your First Upload
Suppose you're building a user profile.
Tell condoo.Vibe:
Allow users to upload a profile photo from their Account Settings page. Upload the image through Cloudinary and display it on their profile after the upload succeeds.
Conceptually:
Select Photo
     ↓
Validate File
     ↓
Upload to Cloudinary
     ↓
Save Media Reference
     ↓
Update Profile
     ↓
Display Photo
The upload becomes part of the application's workflow.
Define What Users Can Upload
Don't simply say:
Add file upload.
Describe what the upload is for.
For example:
Allow users to upload a profile image.
Or:
Allow agents to upload property photos when creating or editing a listing.
Or:
Allow store administrators to upload product images.
The context helps condoo.Vibe understand how the uploaded media should relate to the rest of the application.
File Types
You can define which types of files your application should accept.
For example:
Accept JPG, PNG, and WebP images for property listings.
This helps prevent users from uploading files your feature wasn't designed to handle.
File Size Limits
You may also want to restrict file size.
For example:
Profile photos must be JPG, PNG, or WebP and no larger than 5 MB.
Or:
Allow product images up to 10 MB each.
The exact limits you choose should reflect your product requirements and the capabilities of your Cloudinary account.
Single Image Uploads
Some features need only one image.
Examples include:
User → Profile Photo

Company → Logo

Article → Cover Image

Category → Thumbnail
A simple prompt could be:
Add a company logo uploader to Workspace Settings. Accept JPG, PNG, and WebP. After a successful upload, display the logo in the workspace header.
Multiple Image Uploads
Other features need galleries.
Real estate is a good example.
You could ask:
Allow agents to upload up to 20 images for each property listing. Show upload progress and display the uploaded images in a gallery. Agents should be able to remove images before saving the listing.
Conceptually:
Property Form
      ↓
Select Images
      ↓
Validate
      ↓
Upload to Cloudinary
      ↓
Save References
      ↓
Property Gallery
Example: Real Estate Gallery
Suppose you're building a property marketplace.
Each property can have multiple images.
You could tell condoo.Vibe:
Add an image gallery to property listings. Agents should be able to upload up to 20 JPG, PNG, or WebP images. Let them choose a primary image that will be used on property cards and search results.
Now the application needs to understand more than simply uploading files.
It needs to know:
- Which images belong to the property
- Which image is primary
- How images are displayed
- How images are removed
- How the gallery is ordered
That's a complete media feature.
Primary Images
For galleries, it's often useful to define a primary or featured image.
For example:
Property
   ↓
20 Images
   ↓
1 Primary Image
   ↓
Search Result Card
You can ask:
Allow agents to set one property image as the primary image. Use that image on property cards throughout the application.
Reordering Images
Image order can matter.
For example:
Allow agents to drag and reorder property images. Preserve that order when displaying the public property gallery.
This turns a simple uploader into a proper media-management experience.
Removing Images
Users may also need to remove uploaded media.
For example:
Allow users to remove their current profile photo and upload a replacement.
Or:
Agents can remove individual images from a property gallery.
Be careful when deleting media from applications already containing real user content.
The application may need to update both the Cloudinary asset and the corresponding database reference.
Replacing Images
Sometimes replacing is better than treating every update as a new independent file.
For example:
When a user uploads a new profile photo, replace the current profile image and update their account to use the new image.
Your application's behavior should make it clear which image is currently active.
Upload Progress
Large images or multiple uploads may take time.
Your interface should communicate what's happening.
For example:
Uploading 3 of 8...

████████████░░░░░
You can ask condoo.Vibe:
Show upload progress while property images are being uploaded. Disable the Save Property button until required uploads are complete.
This prevents users from wondering whether the application is working.
Upload Success
After an upload completes, the application should reflect the result.
For example:
Show the uploaded profile photo immediately after the upload succeeds.
Or:
Add successfully uploaded property images to the gallery preview.
Users should receive clear feedback that their upload worked.
Upload Failures
Uploads can fail.
For example:
Upload
  ↓
Cloudinary
  ↓
Failed
  ↓
Show Error
  ↓
Retry
Don't leave users guessing.
You could tell condoo.Vibe:
If an image upload fails, show which image failed and allow the user to retry without re-uploading the successful images.
This becomes especially useful for multi-image uploads.
Image Optimization
Large images can make applications unnecessarily slow.
Cloudinary provides capabilities for delivering optimized media.
When building image-heavy experiences, ask condoo.Vibe to use appropriate image delivery and optimization behavior.
For example:
Optimize property images for web delivery and use appropriately sized images for listing cards rather than loading the full-size originals everywhere.
A listing card doesn't necessarily need the same image dimensions as a full-screen property gallery.
Responsive Images
Your application may be viewed on:
- Phones
- Tablets
- Laptops
- Large desktop displays
The media experience should work across those screen sizes.
For example:
Make the property gallery responsive and ensure listing images remain appropriately sized and cropped across mobile and desktop.
Image Cropping
Different interfaces may require different image shapes.
For example:
Profile
1:1

Property Card
4:3

Hero Image
16:9
You can describe the visual result you want.
For example:
Display profile photos as square images with consistent cropping.
Or:
Use a consistent 4:3 aspect ratio for property cards without distorting the images.
Example: E-commerce Product Images
Suppose you're building an online store.
Tell condoo.Vibe:
Allow administrators to upload up to 8 images per product using Cloudinary. One image should be marked as the primary product image. Allow images to be reordered and removed. Display the primary image on product cards and the complete gallery on the product page.
The workflow becomes:
Admin
  ↓
Create Product
  ↓
Upload Images
  ↓
Cloudinary
  ↓
Save Product + Media References
  ↓
Storefront
Example: User Avatars
A simpler workflow might be:
Allow users to upload or replace their profile photo from Account Settings. Accept JPG, PNG, and WebP up to 5 MB. Display the image in the navigation avatar and on their profile.
This connects one uploaded image to several parts of the application's interface.
Example: Portfolio
For a creative portfolio application:
Allow creators to upload images to projects. Each project can contain up to 15 images. Let creators reorder them and choose a cover image. Display the cover image on portfolio cards and the full collection on the project page.
Again, Cloudinary handles the media while your application manages the product experience around it.
Media and Your Database
Your database may need to remember information about uploaded media.
Conceptually:
PROPERTY
ID: 104

      ↓

PROPERTY IMAGE
Property: 104
URL: ...
Primary: true
Position: 1
This allows your application to understand:
- Which record owns the image
- Where the image is located
- Whether it's the primary image
- Where it appears in the gallery
Cloudinary and Neon work together rather than replacing one another.
Protect Upload Permissions
Not every user should necessarily be allowed to upload or modify every image.
For example:
Only agents who can edit a property should be able to upload, reorder, or delete its images.
Or:
Users can change their own profile photo but not another user's.
These permissions should be enforced appropriately by the application.
Don't Expose Sensitive Credentials
Cloudinary functionality requiring private credentials should run through the appropriate secure application environment.
The conceptual flow is:
Application
    ↓
Secure Logic
    ↓
Cloudinary
rather than exposing sensitive credentials directly to every user's browser.
Common Problems
Images aren't uploading
First determine whether the problem affects:
- File selection
- Validation
- Cloudinary upload
- Database update
- Displaying the returned image
Tell condoo.Vibe which part is failing.
Upload succeeds but image doesn't appear
The Cloudinary upload may be working while your application isn't correctly saving or displaying the resulting media reference.
Tell condoo.Vibe:
The image uploads successfully to Cloudinary, but it doesn't appear on the property after saving. Debug how the uploaded image reference is being stored and retrieved.
Image appears after upload but disappears after refresh
This often suggests that the application is displaying temporary frontend state without correctly persisting the media reference.
Tell condoo.Vibe:
The profile image appears immediately after upload but disappears after refreshing the page. Make sure the uploaded image reference is saved to the user's profile and loaded from the database.
Images are too slow
Large media files may be delivered at unnecessarily large sizes.
Ask condoo.Vibe to inspect how images are being loaded and optimize the delivery for the contexts where they're displayed.
Wrong image appears
This may indicate an incorrect relationship between the uploaded media and its owning database record.
Give condoo.Vibe the specific example and ask it to inspect the relationship.
Debugging Cloudinary
A useful Debug Mode request might look like:
Expected: When an agent uploads property images and saves the listing, the images should remain attached to the property.
Actual: Images upload and appear in the preview, but disappear after refreshing the page.
The property itself saves correctly.
Debug the Cloudinary upload and database persistence workflow without changing the property form design.
This separates the media problem from the rest of the application.
Test Your Upload Experience
Before publishing, test:
- Supported file types
- Unsupported file types
- Maximum file size
- Single uploads
- Multiple uploads
- Upload progress
- Failed uploads
- Retry behavior
- Removing images
- Replacing images
- Image ordering
- Primary images
- Page refresh
- Mobile layouts
- User permissions
Also test what happens when a user uploads a much larger image than expected.
A Good Cloudinary Prompt
A strong request defines:
- What is being uploaded?
- Who can upload it?
- Which formats are accepted?
- How many files are allowed?
- What size limits apply?
- Where should the media appear?
- Can users replace, remove, or reorder it?
For example:
Allow agents to upload up to 20 images for each property using Cloudinary. Accept JPG, PNG, and WebP up to 10 MB each. Allow images to be reordered and removed, and let the agent choose one primary image. Use the primary image on property cards and display the complete gallery on the property detail page.
That's much stronger than:
Add image upload.
Think in Media Workflows
A useful mental model is:
SELECT
  ↓
VALIDATE
  ↓
UPLOAD
  ↓
STORE REFERENCE
  ↓
DISPLAY
  ↓
MANAGE
Cloudinary handles the media infrastructure.
Your condoo.Vibe application determines how that media fits into the product.
Next: OpenAI
We've connected payments, email, communications, and media.
Now we move into AI integrations.
Next is OpenAI, where we'll cover how to connect OpenAI to an condoo.Vibe project and build AI-powered features directly into your application.
Examples include:
- AI assistants
- Content generation
- Summarization
- Classification
- Data extraction
- AI-powered workflows