 condoo.Vibe
Stripe
Connect Stripe to accept one-time payments, subscriptions, upgrades, and downgrades, and gate features by real subscription state.
Stripe lets you accept payments and manage billing inside applications you build with condoo.Vibe.
You can use Stripe to build:
- One-time payments
- Recurring subscriptions
- SaaS pricing plans
- Checkout experiences
- Upgrades and downgrades
- Customer billing management
- Payment-driven access to features
Once Stripe is connected, you can describe the payment experience you want and let condoo.Vibe build the application logic around it.
Connect Stripe. Describe your billing model. Let condoo.Vibe build the payment experience.
What you can build with Stripe
Stripe can power many different types of payment workflows.
One-time purchases
For example:
Sell this course for $99. Customers should receive access to the course after successful payment.
Subscriptions
For example:
Create Starter, Pro, and Business plans at $0, $29, and $99 per month.
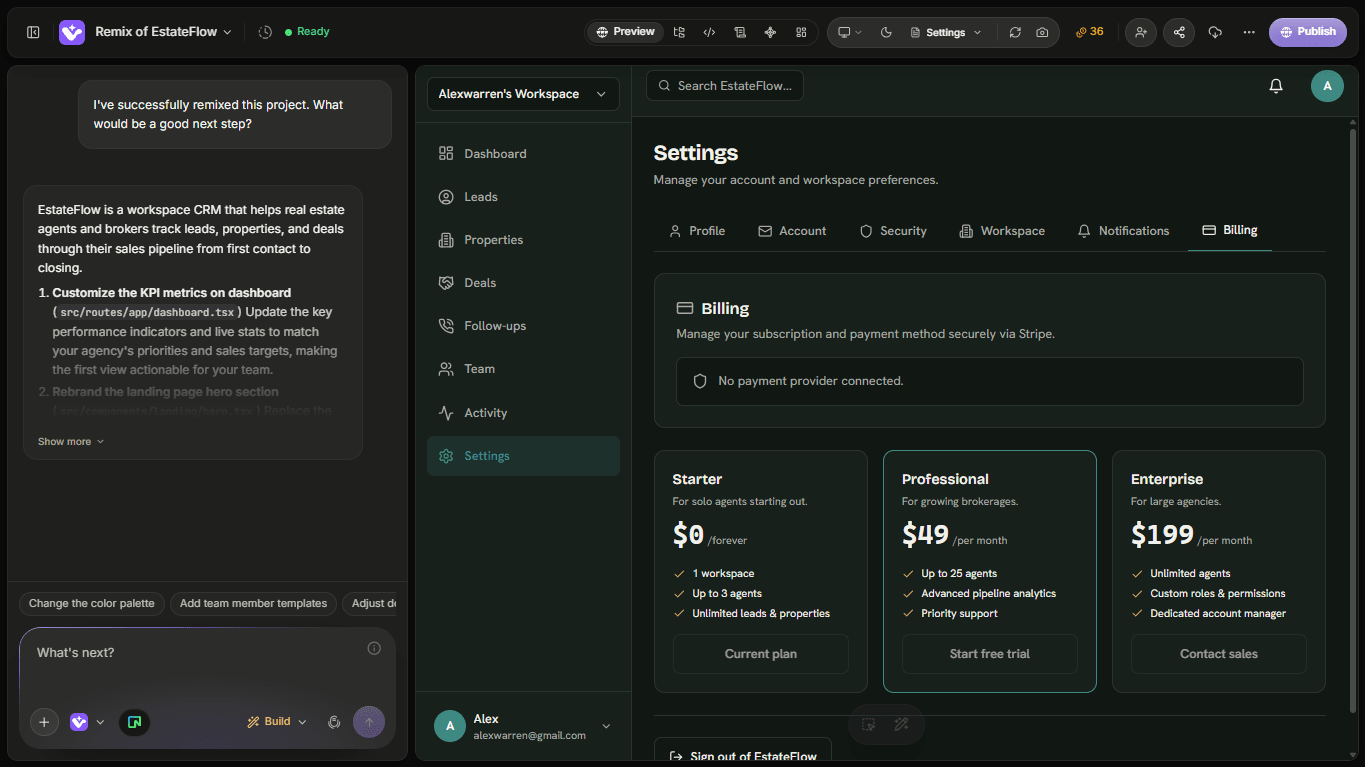
Paid bookings
For example:
Customers must pay a $50 consultation fee before their appointment is confirmed.
Feature access
For example:
The Analytics feature should only be available to customers with an active Pro or Business subscription.
Billing management
For example:
Add a Billing page where customers can see their current plan and manage their subscription.
condoo.Vibe can build these experiences around your Stripe connection.
Before You Start
You'll need a Stripe account before connecting Stripe to your application.
You'll also need the appropriate Stripe credentials for the environment you're using.
Stripe provides separate environments for testing and live payments.
Connect Stripe to condoo.Vibe
Open your condoo.Vibe project and navigate to the Connectors area.
Find Stripe and select it.
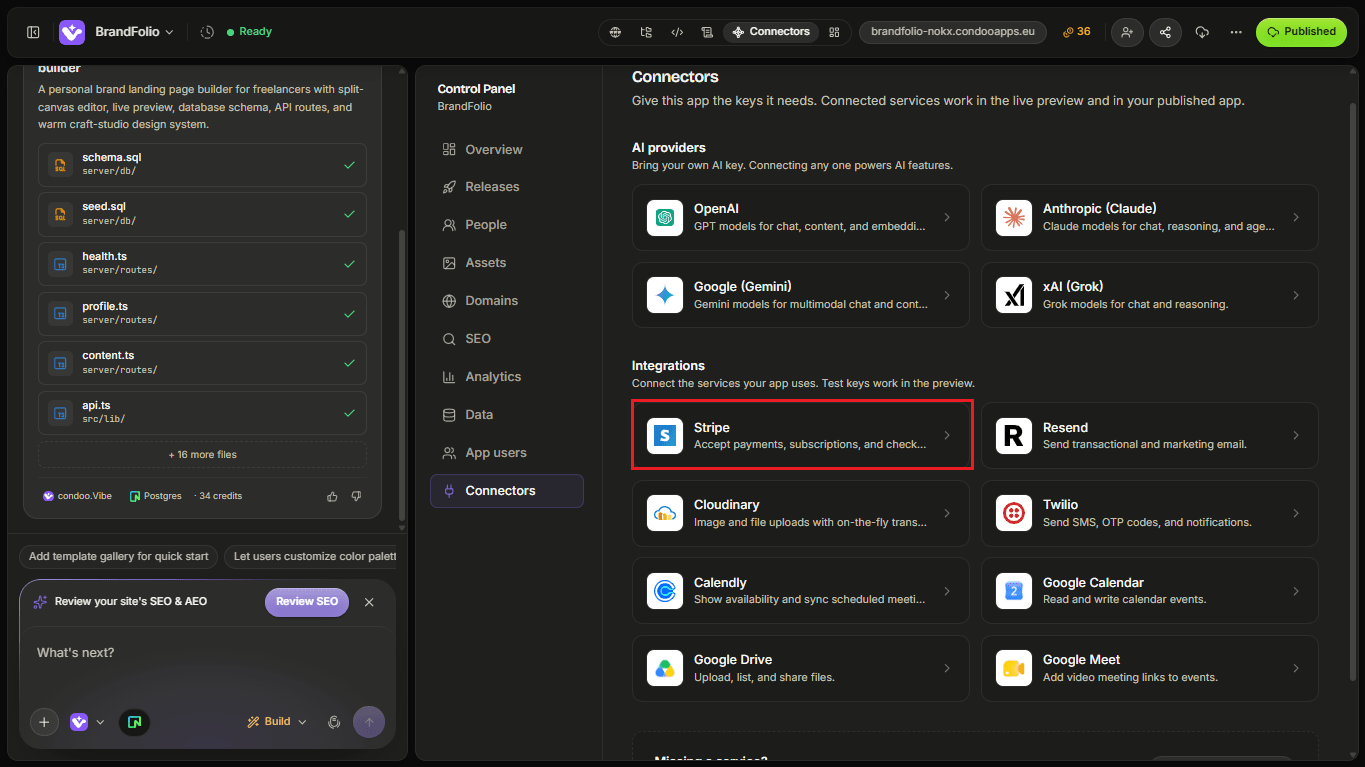
Follow the connection flow and provide the Stripe credentials requested by condoo.Vibe.
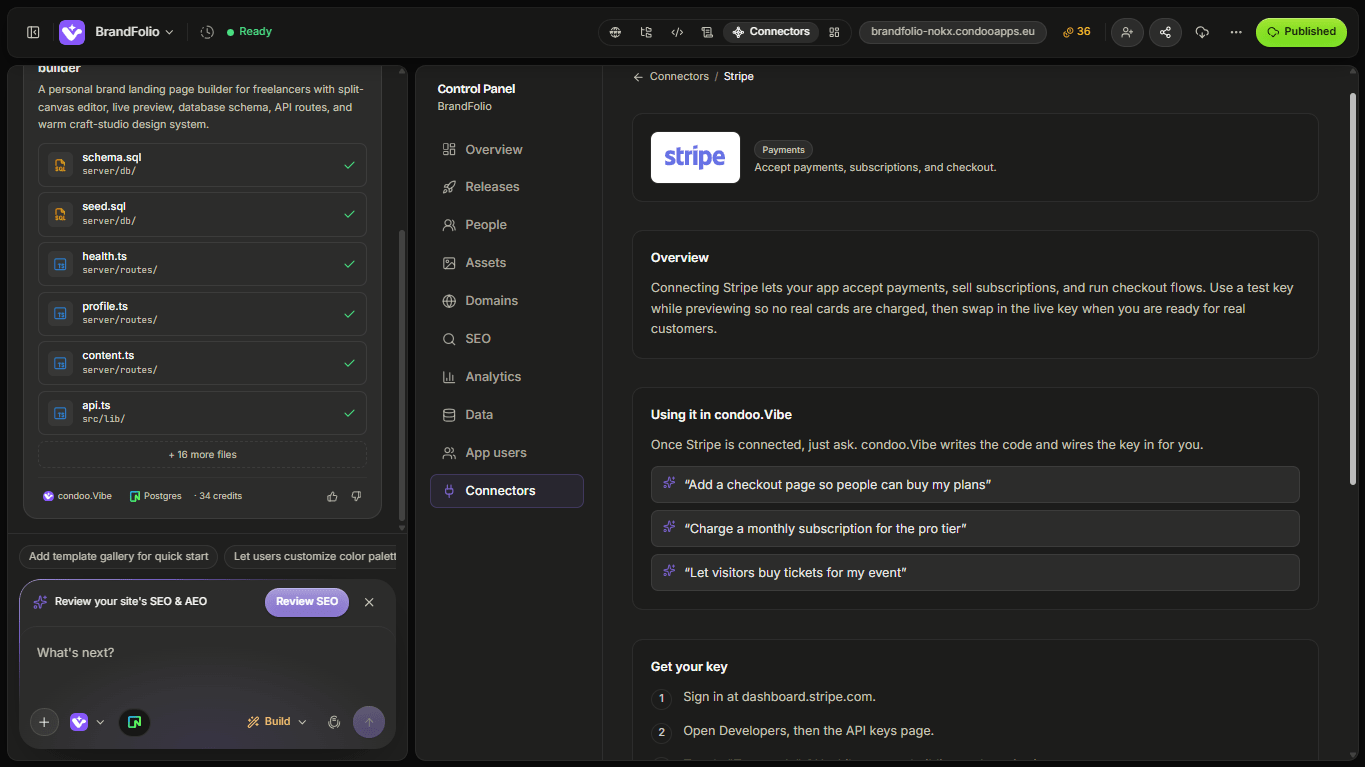
Once the connection is configured, Stripe becomes available for the application you're building.
Test Mode vs Live Mode
Stripe provides separate environments for development and production.
Test Mode
Use this while building.
Transactions don't charge real cards, allowing you to test:
- Successful payments
- Failed payments
- Checkout
- Subscriptions
- Billing flows
- Webhooks
- Application behavior after payment
Live Mode
Use this when you're ready to accept real customer payments.
A recommended workflow is:
Stripe Test Mode
      ↓
Connect to condoo.Vibe
      ↓
Build payment workflow
      ↓
Test complete flow
      ↓
Fix any issues
      ↓
Configure Live Mode
      ↓
Test configuration
      ↓
Publish
Don't use real customer payments as your first test of a new billing system.
Build Your First Payment Flow
Once Stripe is connected, tell condoo.Vibe what you want customers to purchase.
For example:
Add a one-time payment of $29 for the Complete Marketing Course. Customers should click Buy Now, complete payment through Stripe, and receive access to the course dashboard after successful payment.
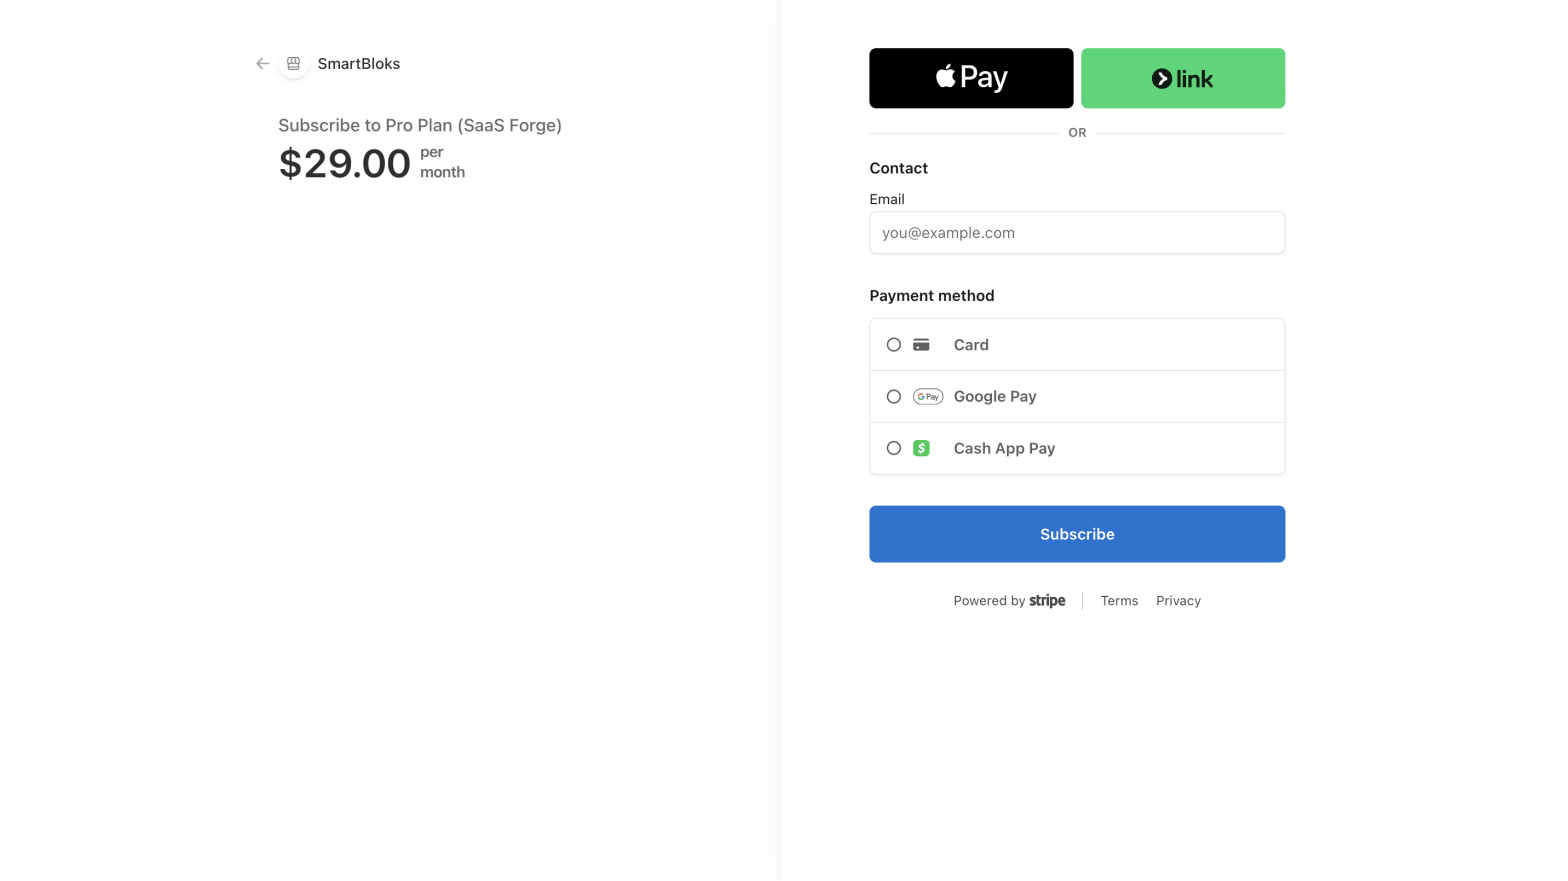
condoo.Vibe can build the workflow around that requirement.
Conceptually:
Customer
   ↓
Buy Now
   ↓
Stripe Checkout
   ↓
Payment
   ↓
Verify Payment
   ↓
Record Purchase
   ↓
Grant Access
   ↓
Course Dashboard
The important part isn't simply getting the customer to Stripe.
Your application also needs to know what should happen after payment.
Building Subscriptions
Stripe is especially useful for SaaS applications with recurring billing.
Suppose you have:
Starter
$19/month

Pro
$49/month

Business
$99/month
You could tell condoo.Vibe:
Add monthly subscriptions for Starter at $19, Pro at $49, and Business at $99. Users should select their plan from the pricing page and complete payment through Stripe. After successful payment, update their account with the correct subscription.
Now you're defining both the payment and the application behavior.
Define what each plan includes
Pricing isn't the only thing condoo.Vibe needs to understand.
Tell condoo.Vibe what each subscription unlocks.
For example:
Starter users can create up to 3 projects. Pro users can create up to 20 projects and access analytics. Business users have unlimited projects, analytics, and team collaboration.
Your application can then use the customer's subscription to determine which functionality is available.
Conceptually:
Stripe Subscription
       ↓
Application
       ↓
Current Plan
       ↓
Feature Permissions
Payment Success
Don't define payment behavior only around checkout.
Tell condoo.Vibe what should happen after Stripe confirms a successful payment.
For example:
After successful payment, record the purchase, update the customer's subscription, unlock Pro features, and redirect them to the dashboard.
This creates a complete payment workflow.
Payment Failure
Payments can fail.
Your application should handle that properly.
For example:
If payment fails, don't activate the subscription. Show the customer that payment was unsuccessful and allow them to try again.
Conceptually:
Payment Attempt
      ↓
   Successful?
    ↙       ↘
  Yes        No
   ↓          ↓
Activate     Keep Current
Plan         Access
   ↓          ↓
Dashboard    Retry
Don't Trust the Success Page Alone
A customer reaching:
/payment-success
doesn't necessarily prove that payment was successfully completed.
Important payment events should be verified through the appropriate server-side Stripe workflow.
Your application should use confirmed payment information before activating paid functionality.
Stripe Webhooks
Stripe can notify your application when important billing events happen.
These notifications are commonly called webhooks.
For example:
Customer
   ↓
Stripe Checkout
   ↓
Payment succeeds
   ↓
Stripe sends event
   ↓
condoo.Vibe application
   ↓
Subscription updated
Webhooks are especially important for subscriptions because billing events can happen even when the customer isn't currently using your application.
Subscription events happen later
Imagine someone subscribes today.
Thirty days later, Stripe attempts to renew their subscription.
The customer may not even have your application open.
Your application still needs to know whether:
- Renewal succeeded
- Renewal failed
- Subscription changed
- Subscription was cancelled
Stripe can send these events to your application.
Your application can then update its own subscription state accordingly.
Keep Stripe and Your Database in Sync
Your application may store information such as:
User
Plan: Pro
Subscription Status: Active
Stripe Customer ID: ...
Stripe Subscription ID: ...
Stripe remains responsible for payment processing.
Your application uses relevant billing information to determine what experience the customer should receive.
Conceptually:
STRIPE
Payment & Subscription State
        ↓
SERVER-SIDE LOGIC
        ↓
NEON POSTGRES
Application Subscription State
        ↓
YOUR PRODUCT
Features & Access
Keeping these systems synchronized is an important part of building reliable subscription software.
Upgrades
Suppose a Starter customer wants to move to Pro.
You could tell condoo.Vibe:
Allow Starter customers to upgrade to Pro from the Billing page. After Stripe confirms the subscription change, update their account and unlock Pro functionality.
Your application should reflect the updated plan once the billing change succeeds.
Downgrades
Downgrades may require more product decisions.
Imagine:
- Starter: 3 projects
- Pro: 20 projects
A Pro customer currently has 12 projects and downgrades to Starter.
What happens?
You need to decide.
For example:
If a user downgrades below their current project usage, don't delete existing projects. Prevent them from creating additional projects until they're within their new plan limit.
That's a product rule.
Stripe manages the billing change.
condoo.Vibe builds your application's behavior around it.
Cancellations
You should also decide what cancellation means.
For example:
When customers cancel, keep their Pro access until the end of their current billing period. After the subscription expires, move them to the Starter plan.
Or:
This product has no free plan. After the paid billing period ends, keep the account but restrict access until the customer subscribes again.
There isn't one correct cancellation model.
Tell condoo.Vibe how your product should behave.
Customer Billing Management
For subscription products, customers often need somewhere to manage billing.
You can ask condoo.Vibe:
Add a Billing section to Account Settings. Show the customer's current plan and subscription status and provide an option to manage their subscription.
Depending on your Stripe implementation, customers can use Stripe's billing management functionality for actions such as managing their subscription or payment details.
Paid Feature Restrictions
Your application should enforce paid functionality based on actual subscription state.
For example:
Analytics
   ↓
Active Pro or Business?
     ↙          ↘
   Yes           No
    ↓             ↓
 Show           Upgrade
Analytics        Prompt
You might tell condoo.Vibe:
Analytics should only be available to Pro and Business customers. Starter users should see an upgrade page instead.
Important paid-access rules should be enforced appropriately rather than relying only on hiding navigation links.
Example: SaaS Subscription
Here's a more complete prompt:
Add Stripe subscriptions to this SaaS application.
Create three monthly plans:
Starter: $19/month: 3 projects
Pro: $49/month: 20 projects + analytics
Business: $99/month: unlimited projects + analytics + team collaboration
Users should select a plan from the pricing page and complete checkout through Stripe.
After Stripe confirms payment, update the user's subscription and unlock the appropriate features.
Add a Billing page showing their current plan and subscription status.
Customers should be able to manage their subscription.
If a subscription expires, restrict features based on their new account state.
For something this important, I'd recommend:
Plan + Max → Review → Build
rather than immediately asking condoo.Vibe to implement everything.
Example: Paid Booking
Stripe isn't only for SaaS.
Suppose you're building a consultation platform.
Customers should choose an available appointment, enter their information, and pay a $100 consultation fee through Stripe. Only create a confirmed booking after payment succeeds. Send the customer a confirmation email afterward.
Conceptually:
Choose Appointment
       ↓
Customer Details
       ↓
Stripe Payment
       ↓
Payment Confirmed
       ↓
Confirm Booking
       ↓
Save to Neon
       ↓
Send Confirmation
This combines Stripe with your database and email integration.
Example: One-Time Digital Product
You could also build:
Sell this report for $49. Customers should pay through Stripe and receive access to the report inside their account after payment is verified.
Your application can record the purchase so the customer doesn't need to pay again every time they return.
Test Your Payment Workflow
Before accepting real payments, test the entire customer journey.
Don't only test whether Stripe Checkout opens.
Test:
Checkout
Can the customer reach Stripe?
Successful payment
Does the application recognize the payment?
Application state
Does the user's plan or purchase update?
Feature access
Are the correct features unlocked?
Refresh
Does the correct access remain after refreshing or signing in again?
Failure
What happens when payment fails?
Cancellation
Does your application respond correctly?
Renewal
For subscriptions, does the application process billing events correctly?
Permissions
Can users access features they haven't paid for?
Payment testing should cover the complete workflow, not only the payment screen.
Common Problems
Checkout doesn't open
Check whether Stripe is connected correctly and whether the application is successfully creating the checkout session.
Use Debug Mode and provide any error message you receive.
Payment succeeds but plan doesn't update
This usually means the payment itself and your application's subscription state need to be investigated separately.
Tell condoo.Vibe:
Stripe payment succeeds, but the user's plan remains Starter afterward. Debug the payment confirmation and subscription update flow. Don't change the checkout interface.
Plan updates only after refreshing
Tell condoo.Vibe:
Stripe successfully updates the subscription, but the dashboard continues showing the previous plan until the page is refreshed. Fix the application state so the updated subscription appears after payment.
Users can access paid features without paying
This is more serious.
Tell condoo.Vibe:
Users without an active Pro subscription can access the Analytics feature directly. Audit the Pro feature authorization and ensure paid access is enforced appropriately on the server side.
Test payments work but live payments don't
Check that you've moved from the correct Stripe test configuration to the appropriate live configuration.
Test and live credentials are different.
Also verify that any production webhook configuration required by your application is correctly configured.
Debugging Stripe
If something isn't working, use Debug Mode.
A strong debugging request looks like:
Stripe checkout completes successfully.
Expected: The user should be upgraded to Pro immediately after payment.
Actual: Payment succeeds, but the user's account remains on Starter.
The Stripe transaction appears successful.
Debug the complete payment confirmation and subscription update flow. Identify the root cause and fix it without changing the existing pricing or checkout UI.
Give condoo.Vibe:
- What should happen
- What actually happens
- Any error you're seeing
- Which part already works
This helps condoo.Vibe narrow down the issue.
Keep Your Stripe Credentials Secure
Stripe secret credentials should never be intentionally exposed in your application's frontend.
If you believe a live Stripe credential has been exposed, rotate or revoke it through Stripe and update your application's configuration.
Think Beyond the Payment Button
Adding Stripe isn't simply:
Put a payment button here.
Think about the complete lifecycle:
PLAN
 ↓
CHECKOUT
 ↓
PAYMENT
 ↓
VERIFICATION
 ↓
SUBSCRIPTION / PURCHASE
 ↓
FEATURE ACCESS
 ↓
RENEWAL
 ↓
UPGRADE / DOWNGRADE
 ↓
CANCELLATION
For simple one-time purchases, the workflow may be much smaller.
For subscription SaaS products, billing becomes part of your product architecture.
condoo.Vibe can help build that architecture when you clearly describe how your business model should work.
Next: Resend
Stripe handles money.
Next, we'll connect your application to Resend so it can communicate with users through transactional email.
We'll cover workflows such as:
- Welcome emails
- Booking confirmations
- Order confirmations
- Contact notifications
- Team invitations
- Application-triggered emails